


Paramotor muffler repair
by Had Robinson
updated June 16, 2026
The problem
Most mufflers a.k.a. silencers on paramotors share the same design of a shell (the outside of the muffler) containing a perforated tube that connects the input and output of the muffler. Surrounding the perforated tube is fiberglass insulation.
Below is a photo of a typical automotive glass-packed muffler that is similar to what is used on paramotors.
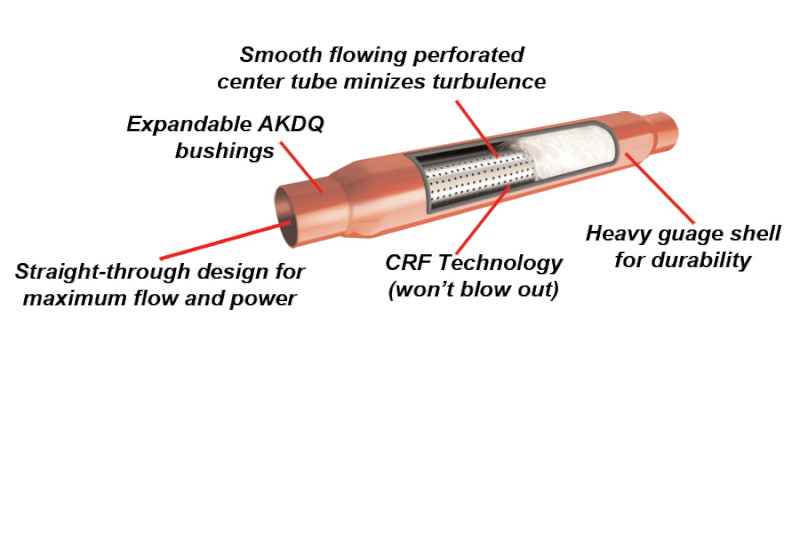
These mufflers have a common problem caused by the severe vibration of all paramotor engines: structural failure of the internal parts. Typically, the perforated tube breaks loose from the flanges at one or both ends of the muffler. Once the tube is loose it begins to flop around inside and damage the fiberglass packing which may be ejected or clog the muffler. Baffles inside the muffler that hold the perforated tube in place may also separate from the muffler shell and damage things.
Restriction of the engine exhaust stream has a number serious effects. The worst is the increase of pressure inside the crankcase. This causes failure of the carburetor's internal fuel pump which may fail to keep with engine demand for fuel. All paramotors engines have pulse-port driven fuel pumps. A small hose or port connects the crankcase to one side of the fuel pump diaphragm. The pulses from the crankcase move the diaphragm up and down which, in turn, moves the fuel from the tank to the metering lever valve or the fuel bowl inside the carburetor, depending on whether it is a diaphragm or float-bowl type carburetor, respectively.
An engine with this condition has an erratic, non-adjustable idle, if it will idle at all. The reed valve inside the engine will be subjected to much higher pressures which can cause a premature failure of the valve.
How can we tell if the muffler is clogged? The increased internal pressure will force exhaust gases and burnt oil out of the system at the smallest joint. Pilots will notice there is more black gunk around the joints in the exhaust system.
To check for damage, remove the muffler and shake it. If anything is moving around inside, the muffler must be disassembled. Using a bright flashlight, examine the muffler through the input side. You should be able to see completely through the muffler to the output side.
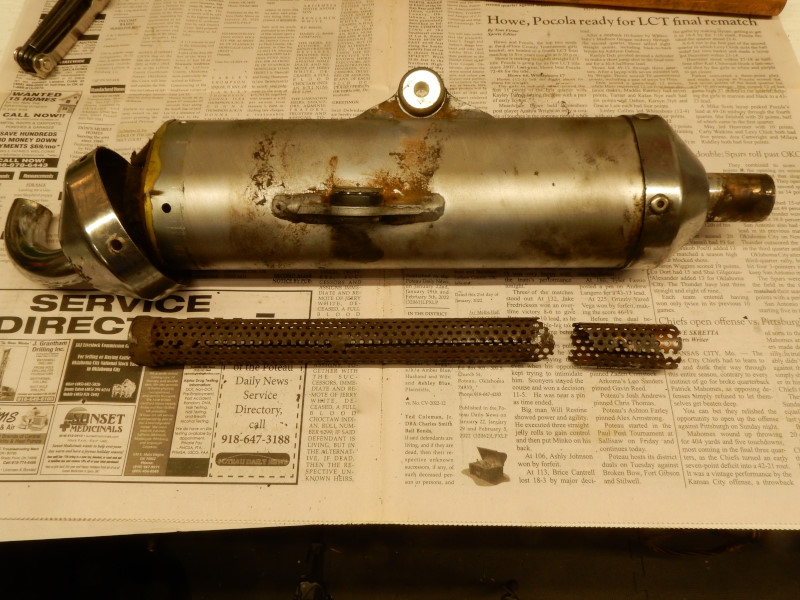
Below are photos of a typical muffler (from a Polini Thor 130) that had the internal perforated tube come loose and self-destruct. Why not buy a new muffler? New mufflers are expensive – $600 and up. If you do, you will just have the same problem occur again. These mufflers are not well made and can fail after 200-300 hours. The good news is that pilots can repair them.
The important general thing about working on paramotors is that all attached parts, like a muffler, must be able to move some. This is done by using springs or riveting parts together rather than welding or bolting them. The rivets give slightly and allow parts to move independently of each other. Yours truly discovered this after discovering fatigue cracks of the aluminum tubing on the frame. The cracks were welded but they just reappeared again. Instead of welding things, a short piece of aluminum angle and rivets was used to hold the cracked tubing together. This repair has lasted over 150 hours with no problems.
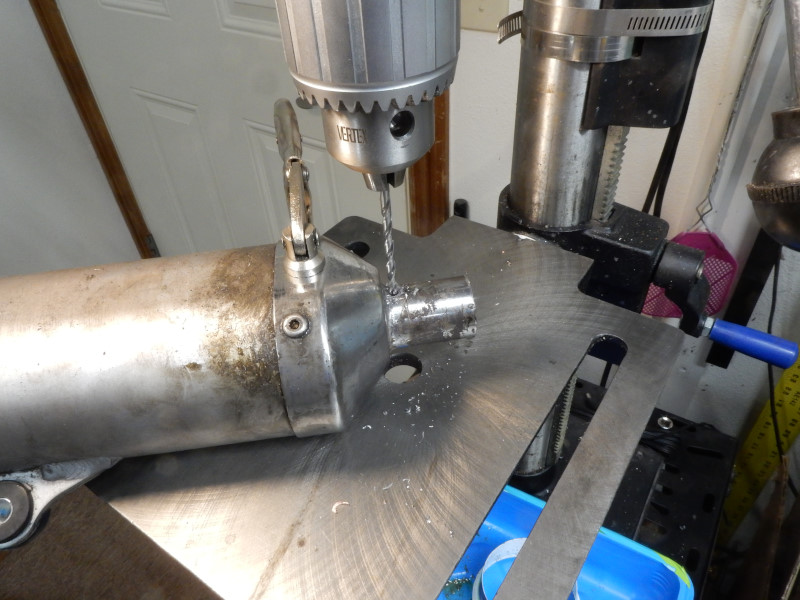
The muffler can be disassembled by drilling out the rivets which hold it together. The perforated tube on the muffler below broke loose from the input (right end in the photo below) of the muffler. Once this happened it quickly broke loose at the output end. Banging around, the perforated tube self-destructed further and began chewing away at the fiberglass packing, further clogging the muffler. The manufacturer had made a quick tack-weld of the perforated tube to the input end but not the other. It was no wonder that the muffler failed. As most already know, Italian QC is poor.
The repair
Thankfully, tube dimensions worldwide are not metric but Imperial (British). This means that we in the U.S. can use commonly available fittings, such as copper sweat fittings that are durable and have more give than steel. The repair of your muffler should be close to the example here as most paramotors are made in Italy.
Depending on the brand and model, you will have to disassemble it to determine the size and length of the perforated tube and various fittings. It is important to use only steel or SS rivets of the same size as the original. Stainless steel rivets are available and are very tough and will not rust. Aluminum rivets will quickly wear through and fail.
Remove only the output cap on the end of the muffler. It is usually unnecessary to remove the input cap.
Parts
- 1/4 diameter steel or SS rivets. Some mufflers may use smaller rivets but they must be steel or SS. A HD rivet gun
must be purchased to handle 1/4" rivets.
- 25.4mm (1") outside diameter stainless steel perforated tubing (the most common size). It is available on eBay but is only
12" in length which may not be long enough for some mufflers. Larger sizes e.g., 32mm (1.25"), are readily available in 250mm
(2') or 500m (2') lengths which could be substituted for the 25mm (1") tubing.
- Replacement fiberglass insulation. Pipe-wrap works the best and easy to install. When the perforated tubing gets
loose, it starts to chew up the existing fiberglass packing which must be replaced, the more the better. Manufacturers supply
replacement packing but it is no better than cheap pipe-wrap.
- Silicone cement – ordinary household silicone can be used to seal the end pieces of the muffler. If this is not done, burned oil tends to get everywhere and make a mess. The silicone also helps prevent things from vibrating.
Repair if a new SS tube is available
Most mufflers have internal supports (small extensions of steel tubing) at each end for the perforated tubing.
It is far better to replace the tubing with new stainless steel tubing, if possible. It is important that the new tubing be exactly long enough so that it is tightly held by the end pieces of the muffler and not move around.
In the second photo below, a steel collar is visible that helps strengthen the ends of the perforated tubing from splitting. Pilots who can weld can easily fabricate this collar but it is not absolutely necessary.
When putting everything back together, wrap the existing fiberglass insulation (if any remains) around the perforated tubing so it is slightly compressed when installed.
Thoroughly clean the muffler end pieces and where they attach to the muffler so that the silicone will seal the muffler.
Rivet the repaired muffler assembly back together.
Repair using the existing damaged perforated tube
This is not a recommended repair because the damaged perforated tubing is already weak.
Important note: The repair below did not last very many hours because I did not use enough rivets to repair the perforated tube. The copper fittings are not tough enough. I disassembled the muffler and removed the copper fittings. I then lengthened the damaged tube with a piece of 3/4" electrical metallic tubing (EMT) using many 3/32" steel rivets. So far things have held up well. EMT can be purchased from any hardware store.
With this repair, it is very important to occasional check that the repair has not failed i.e., the perforated tube has either broken again or some loose inside the muffler. You will know that the repair has failed by taking off the muffler assembly and shaking it. If pilots have the FSM installed, they will experience a dramatic and immediate increase in the amount of oil that is scavenged from the auxiliary pump, a side benefit of the FSM.
1. Working on the output end
This muffler had a 1" (25cm) OD perforated tube so I was able to use 3/4" piping and fittings to make the repair. To decrease the diameter 3/4" EMT, cut a slot in it with a hacksaw. (The photos below shows copper fittings - EMT should be used instead because it is much stronger.)
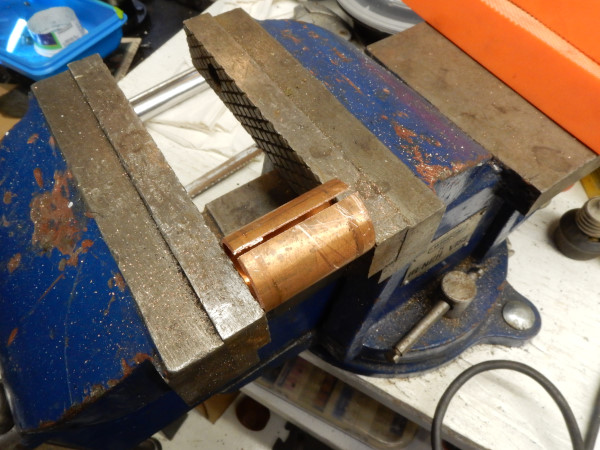
I tapped the modified fitting into the perforated tube at the output end so it could be pushed into a piece of EMT fitted over the output tube inside the muffler. Pilots must modify the EMT to fit their particular brand of muffler.
Below is a fitting that was placed over the output tube.
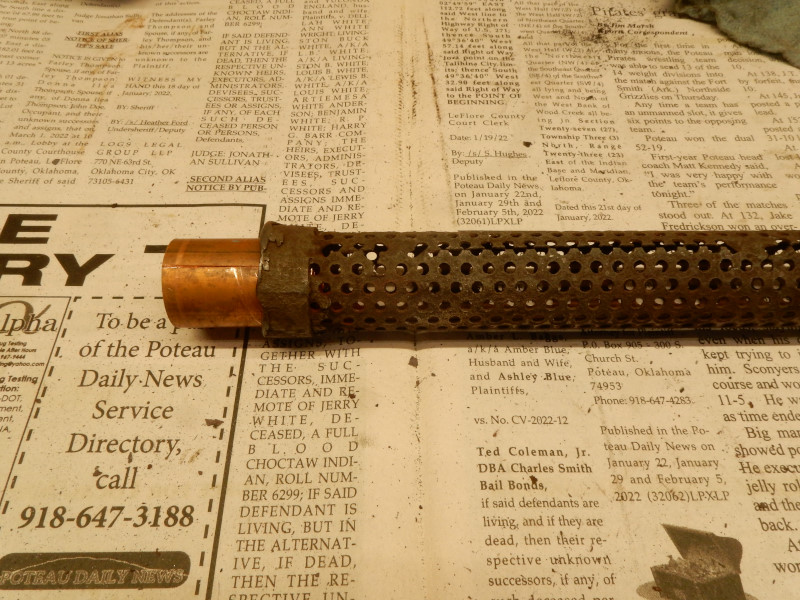
2. Repair of the perforated tube
The broken perforated tube was repaired with a short piece EMT and riveted to each section of the perforated tube. Note: the rivets must be steel!
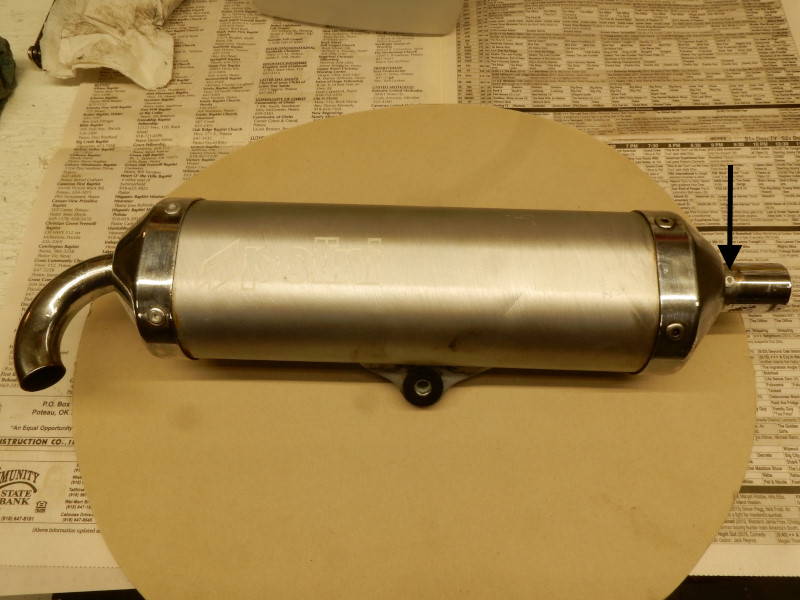
Another short piece of 3/4" EMT was used to secure the repaired perforated tube to the input end of the muffler. The fitting must be tapped in far enough (black arrow) so that the fitting on the end of the expansion chamber does not come in contact with the tubing. This fitting goes both inside and outside the muffler fitting in order to effectively seal the two parts, yet be able to move with respect to each other.
Once the EMT tubing is correctly placed inside the muffler fitting, it must be riveted (perpendicular to the plane of the engine) so that it cannot move in or out of the muffler fitting. If it does, the perforated tube will become loose inside the muffler. Remember to use only steel rivets!
Before reattaching the end cap to the muffler, clean it and the area it comes in contact with thoroughly. Use plenty of automotive RTV cement or ordinary household silicone cement to seal the output end caps to the muffler ends. It will lessen the amount of burnt oil leaking out that makes a mess and less vibration of the internal parts of the muffler.
Muffler cleaned up and ready to reinstall. The only obvious change is the additional rivet in the input fitting (see photo below). If a new perforated tube is used, this rivet is unneeded.
Two stroke engines are messy and there is no simple way to keep them from spitting and leaking. Thankfully, most of the mess gets sucked away by the propeller.
The repair done here can be repeated as often as needed.
![]()

