


Metal Fatigue
by Had Robinson
updated October 7, 2022
After 100's of hours of flying, pilots should thoroughly check their paramotor for fatigue cracks and breaks. The areas that commonly fail are the lower part of the frame, the throttle bracket, and (on some engines) the aluminum fins which extend from the cooling box that direct air to the bottom of the cylinder. Some manufacturers have taken note of this and added silicone sealant to various parts to suppress the harmonic vibrations which eat away at metal parts.
Breakage of the ABM sidebars, their attachment points to the frame, and the side bar pins (bolts) could be catastrophic. These areas should be carefully checked at least yearly, especially on motors with many hours. Careful attention must be especially given to the bolts that attach the arms to the frame on ABM models and similar configurations. These should be replaced at the slightest sign of wear.
Cooling box fin breakage
Pilots may notice that one or both of these fins (located at the bottom of the cylinder on each side) that help direct cooling air through the engine may be separated from the rest of the cooling box. The intense vibration of the Top 80 is what causes this metal fatigue and eventual breakage. The consequence is less air circulating past the cylinder. This may result in slightly higher engine running temperatures. It is not too important that the fin is rattling around but it could come completely loose and go into the propeller and, often enough, get thrown through the glider making a big hole. For the last few years (as of 2018), Miniplane has put a blob of black silicone cement between each cooling box fin and a cylinder fin to stop them from vibrating -- and eventually breaking off. When removing the cylinder, pilots must be certain to re-apply silicone caulk in the same manner as the original.
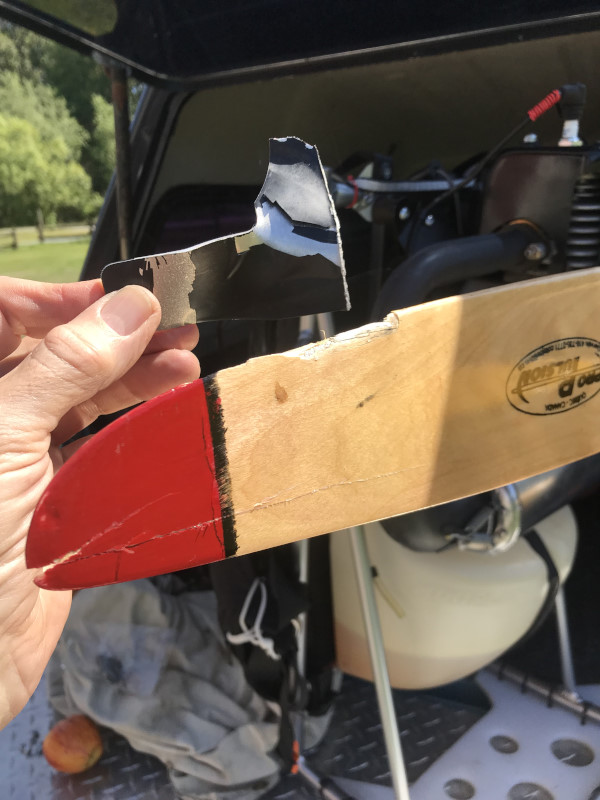
The cooling box fin on this Top 80 broke loose and damaged both the propeller and the wing. Miniplane had not yet started securing the fins with with silicone cement. Photos courtesy of Richard Thompson.
If the fins are already loose, you will have to reattach them to the cooling box with a new strip of aluminum and some rivets. The cylinder will have to be removed to do this. The head O ring will have to be replaced but, if you are very careful, you can reuse the cylinder gasket at its base. (If you tear the base gasket, you are out of luck.) If you do not loosen the cylinder head from the cylinder when undoing everything, you may get away with not replacing any of the gaskets. If you go this route, be certain to check the cylinder top and bottom for leaks after you have run the engine a bit.
If your engine does not have silicone applied, put a blob of automotive RTV blue sealant cement or black silicone cement between the cooling box fin and the engine cooling fin that is right above it. The closer the cement bead is to the tip of the cooling box fin, the less the fin will vibrate. It is easier to do this is with the cylinder removed from the engine. Otherwise, you will have to blob the cement into the space between the two fins to ensure good contact with each surface. All surfaces must be 100% free of any oil or grease to ensure that the cement does not loosen. Cleaning is easily done with brake cleaner. A 1 1/2" long bead of cement between the fins is sufficient. Be certain that the bead of cement is in full contact with the cooling box and engine fins. Let the engine sit overnight after the cement is applied.
The downside of this preventative measure is that every time the cylinder is removed, you will have to reapply the cement to the fins.
Frame breakage
Another area of failure noticed for the Miniplane is the tubular frame near the lower cross member and the lower attachment points for the harness. A competent automobile body shop or, preferably, an aircraft repair facility can TIG weld a break or crack. DO NOT LET A MUFFLER SHOP OR ANY NON-SPECIALIST WELD THIS FRAME. It is very thin aluminum tubing and must ONLY be repaired by an aluminum TIG welding expert. Do not tell what the frame is for. If the welder learns that it is for "aviation", he may not repair it because of liability. However, my experience with welding anything on a paramotor frame has not been good. As often as not, the welded piece will break again, especially if it is from metal fatigue caused by the severe vibrations of the engine. What to do?
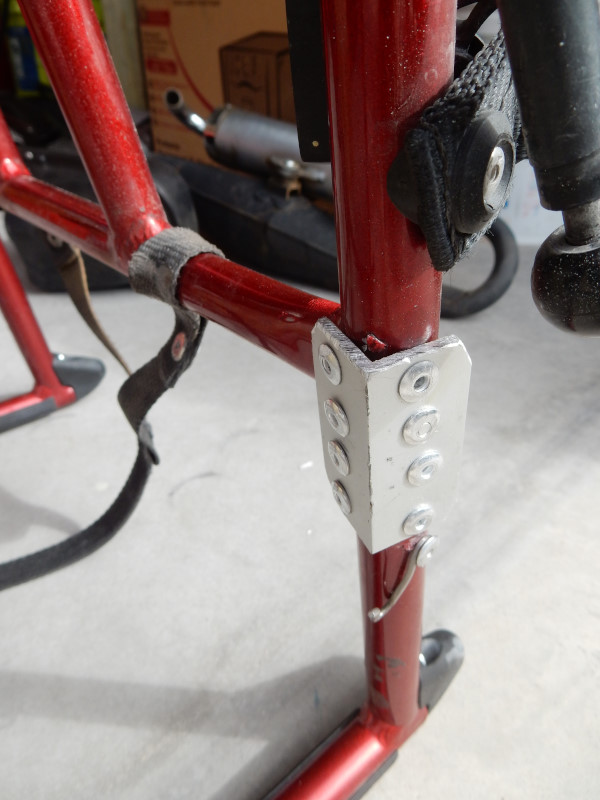
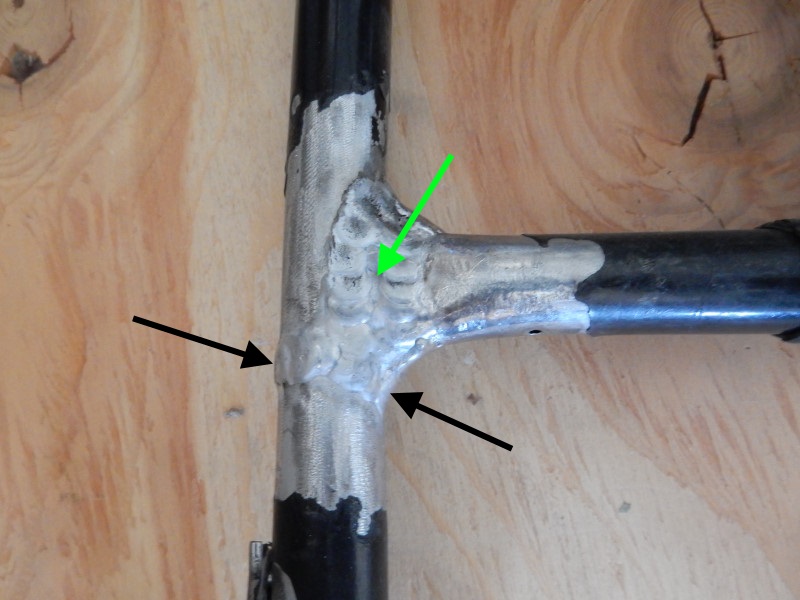
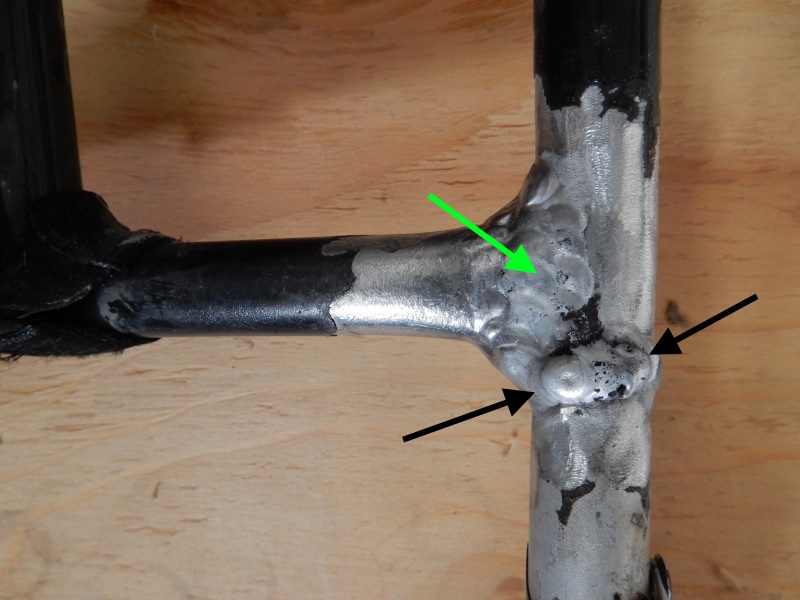
Better than welding is to rivet a piece of aluminum angle to both halves of the frame (see photos below). The advantage is that a rivet repair allows some movement of the the two pieces which would basically stop it from occurring in the same place again. Miniplane needs to use slightly better quality and thicker tubing in this area of the frame but who knows if that will ever happen.
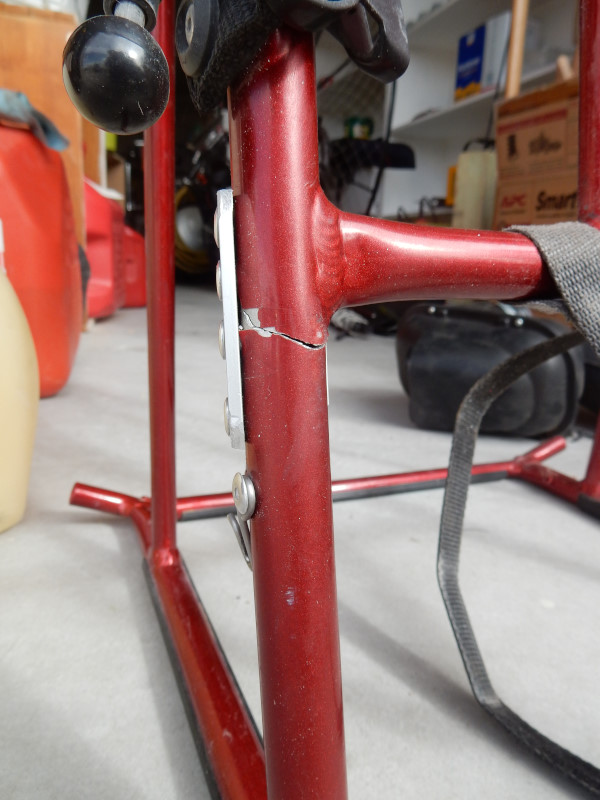
The photo below is of a repaired Miniplane frame that had upwards of 400 hours. The crack was at the black arrows (on both photos). The cracks were barely visible and were only noticed on close inspection. The frame, otherwise, was in perfect condition with no bends or other damage. The green arrows point to additional welding that was done to strengthen where the cross member is joined to the vertical frame members. Had this part of the frame completely separated or failed it would not have posed any danger, just inconvenience. The welding was done by a firm that manufacturers aluminum gas tanks for racing cars. They are experts at working with aluminum. The repair was successful so far but I am not optimistic that it will not crack again. If it does, I will repair the frame as in the frame above. Regardless of how it is done, pilots should examine their entire paramotor carefully and regularly.
Throttle support breakage
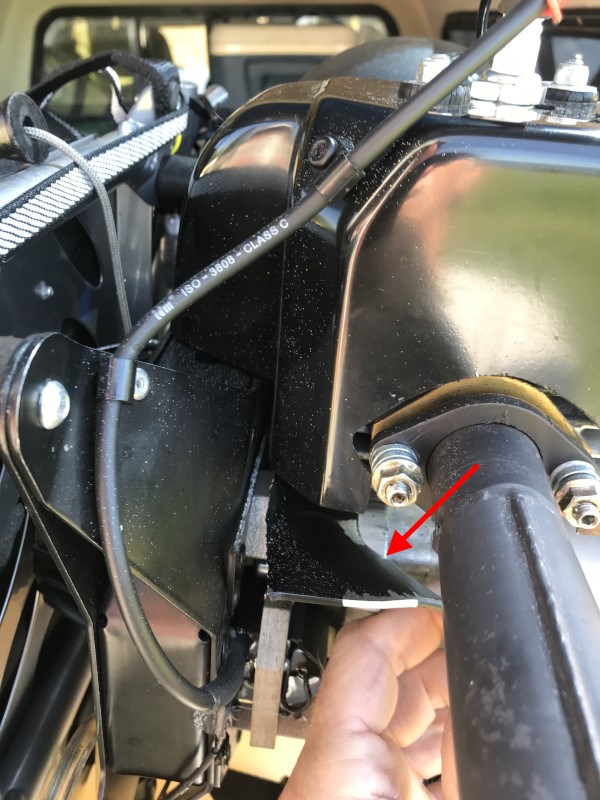
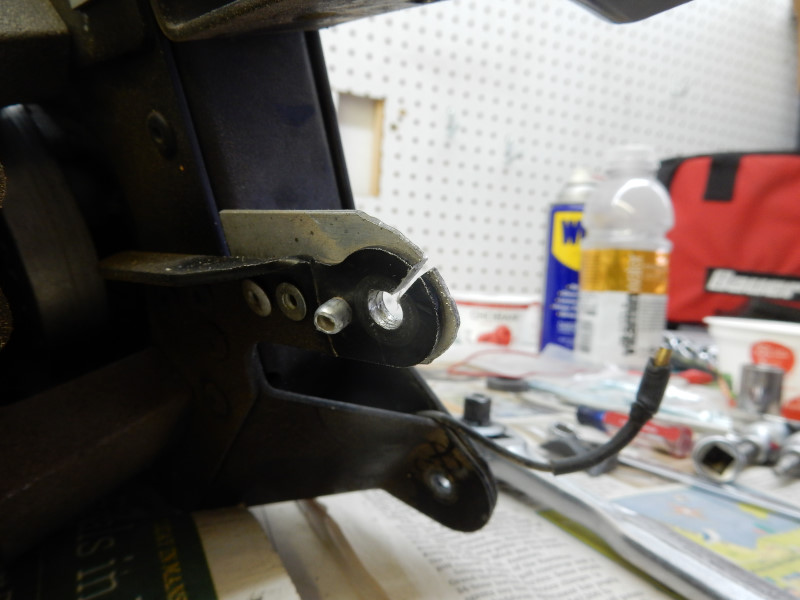
Below is a photo of a throttle and kill switch failure caused by metal fatigue of the support bracket in a Top 80 paramotor. When the bracket broke (white arrows), the ground circuit for the kill switch was also lost. This is why pilots must always have a functioning choke to stop the engine if the kill switch circuit fails. Also visible is an improved throttle return spring setup. It is smoother and longer lasting than the OEM design.
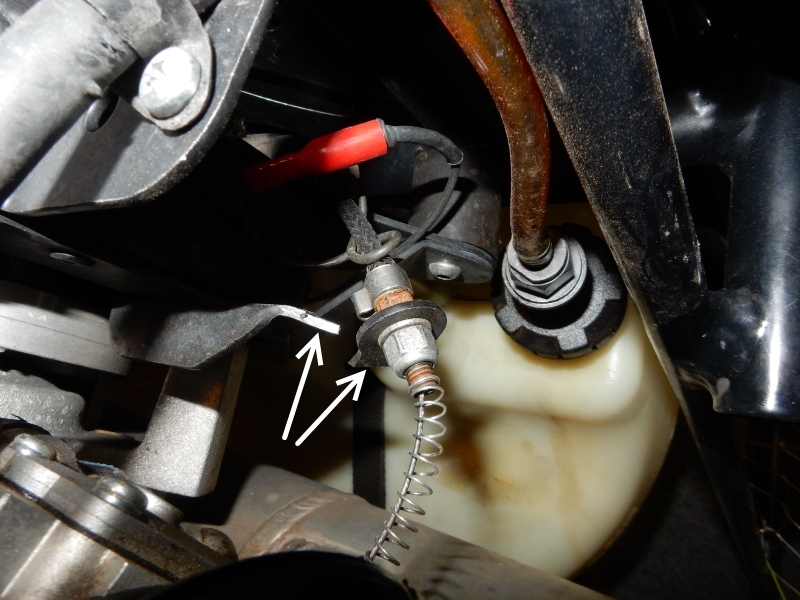
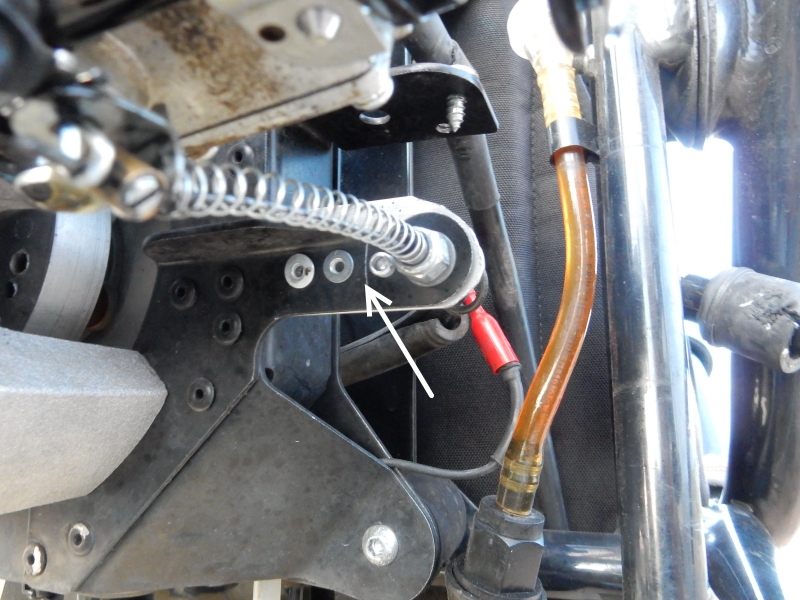
The support bracket was easily repaired with a piece of aluminum and pop rivets. Steel could also be used to make the repair but it weighs more but is less subject to fatigue. The arrow shows the original point of failure. All paramotor engines engines generate severe vibration which is the cause of metal fatigue. Modifying the throttle by adding a spring (prominent in the photo below) decreases stress on carburetor parts and the throttle shaft, in particular. Check the link above for how to do this.
It is also convenient to cut a notch in the throttle bracket so that the throttle cable can be easily removed and replaced. This can be done with a fine hacksaw or a Dremel cut-off wheel. All bicycle Bowden cables have a notch so the cable can be easily removed.
![]()

