


Exhaust port repair tool
by Had Robinson
updated June 26, 2026
The exhaust port on the Top 80 cylinder can be damaged to the point where it will begin to leak black gunk which drips everywhere, including getting on the propeller. The port gets damaged because pilots cranked down on the exhaust nuts. This, in turn, ruins the soft copper exhaust gasket which protects the aluminum cylinder port from the hard steel exhaust pipe. Often enough the steel exhaust pipe grinds away on the soft aluminum cylinder deforming it. A properly installed gasket using sealant will prevent leaks but only if the damage is not too extensive.
This tool is easy to use and will re-cut the port opening. As a result, the copper exhaust flange gasket and exhaust pipe will fit more tightly and not leak.
The exhaust port is usually damaged by not putting the special copper gasket between the port and the steel exhaust pipe (on the early engines, in particular). The hard steel pipe will move around the soft aluminum surface of the exhaust port while the engine is running and chew it up. The copper gasket can also fail (wear out and/or split) and the steel exhaust pipe can then contact the aluminum port and damage it.
Note: those who do not wish to do this repair may contact us and we can do for a nominal machine shop charge.
Special tools needed:
- Exhaust Hole Tool MANF (available from Miniplane-USA)
- Variable speed drill (using a drill press is better)
How to resurface the exhaust port
1. The cylinder may be left on the engine for the repair, though it is better to remove it. If the cylinder is removed, there is no chance the aluminum shavings could find their way into the engine and cause damage. Also, you can use a drill press and hold the cylinder in a vise to secure it better. If the cylinder remains on the engine, be certain to orient the engine so that the exhaust port is facing down AND the piston is at the TDC position.
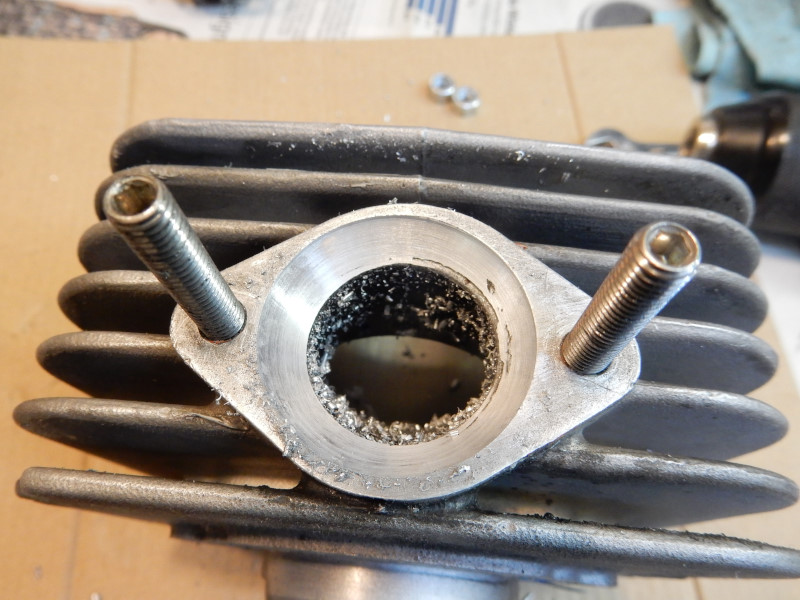
The exhaust port below had some damage that was caused by the steel exhaust pipe. Note the small ridge. The ridge can prevent the exhaust pipe and the copper gasket from sealing properly.
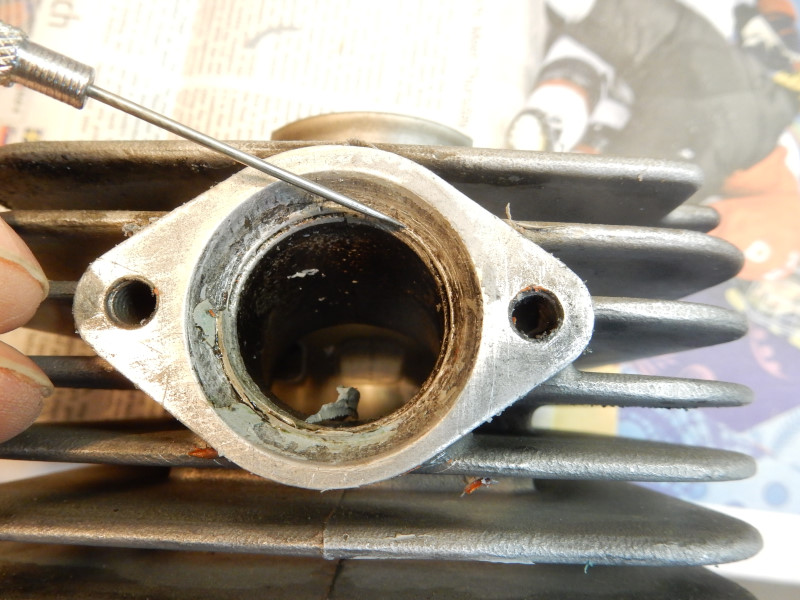
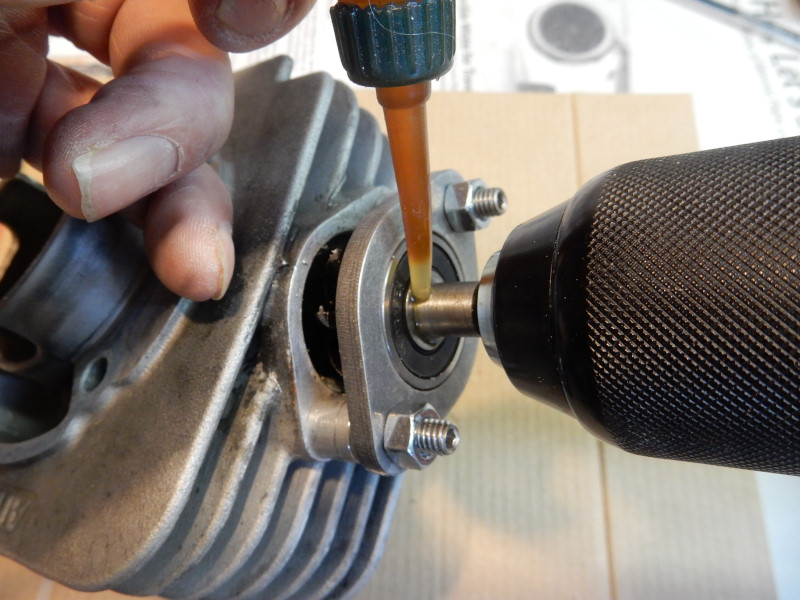
Exhaust tool – make sure the screw holding the cutter to the shaft is tightened firmly. To check this, the tool shaft must be held firmly in the drill chuck while tightening the screw. If it is loose, use blue threadlock to reinstall the screw.
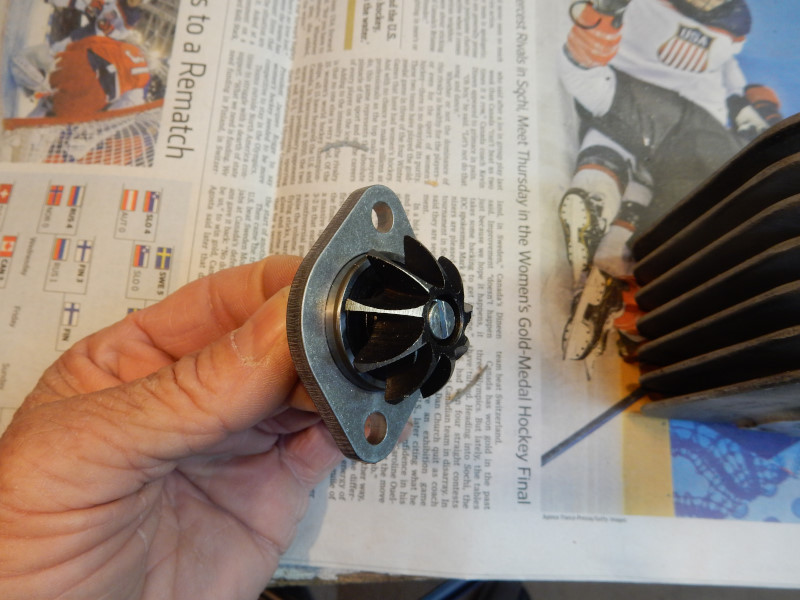
2. If the exhaust port studs are not present, install them. Slide the included spacers onto the studs. The tool must not touch the spacers during operation. It may be necessary to cut the spacers lengthwise so that the cutting edge of the tool misses them.
3. Attach the tool to the exhaust port as shown. Make sure that the aluminum spacers are not touched by the cutting edges of the tool. Before tightening the nuts, push the tool shaft and cutter firmly into the exhaust port and hold it. This will better align the cutting tool with the existing hole so that only a minimum of cylinder head material will be removed. Tighten the nuts to 6-8 Nm.
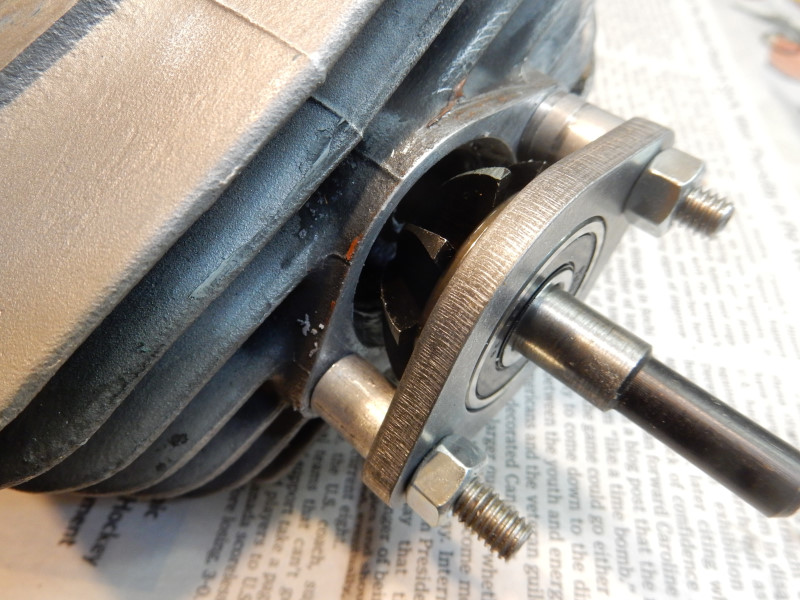
4. Lubricate the tool shaft where it goes through the ball bearing with SAE 30 oil or ATF fluid. The shaft must move smoothly in and out of the bearing. Attach the variable speed drill or drill press to the tool.
5. Now comes the hard part, especially if you do not have a drill press. Fully retract the cutting tool, as above. Start the drill or press at about 60-90 rpm and very slowly push it into the exhaust port hole. If you push the end of the drill that is exactly opposite and in line with the tool, the tool will move in under control. The cutting tool will start to cut high places in the port. Do not push hard on the cutter. Cut away a little bit of the port for a few seconds and then check it.
The goal is to refresh the inside of the port so that there is a good fit between the port and the copper gasket.
Take a look at this short video of the tool cutting the exhaust port. Notice the size of the chips (right pressure) and the slow speed. It can help to use a small amount of cutting oil on the cutter to prevent tool chatter. If you do not use cutting oil, it is a little more difficult to cut smoothly.
DO NOT BE IN A HURRY. DO NOT CUT TOO DEEPLY. CUT JUST ENOUGH TO REMOVE THE RIDGES AND GROOVES IN THE PORT.
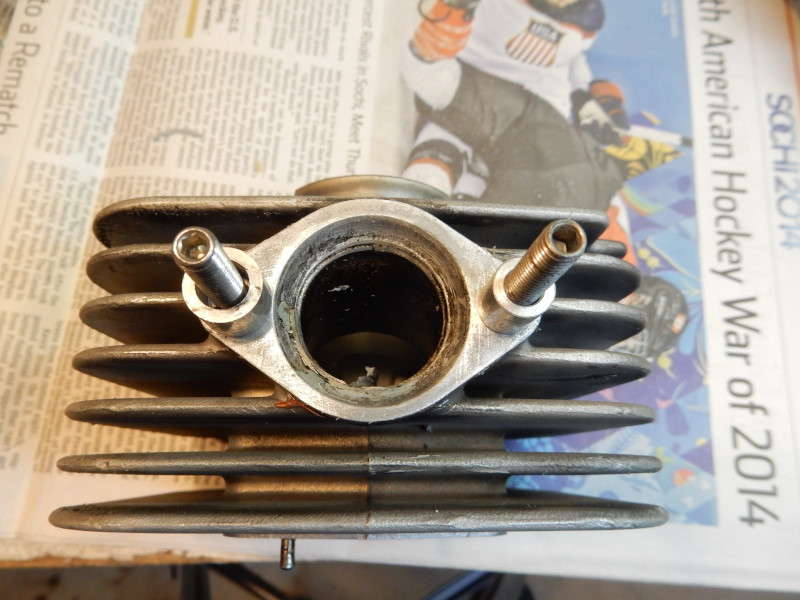
6. The resurfaced cylinder exhaust port. This one was particularly damaged and required that much more of the port had to be removed. Normally this does not need to be done. Reassemble the cylinder (if needed) and the exhaust system. See the squish for information on reassembling the cylinder. See this page for information on correctly installing and seating the exhaust flange gasket.
Remember to let any RTV sealant cure overnight before running the engine. It takes time for it to harden and seal properly.
![]()

