


Replacing shaft seals without disassembly
by Had Robinson
updated December 31, 2025
Introduction
Replacing external seals without having to tear the entire piece of equipment apart is always preferable. In this example, the Miniplane prop seal is no different. Here is how to do it without having to spend hours taking apart and then reassembling the redrive. This technique is particularly important because the screws holding the redrive together can be difficult to remove – even with heat.
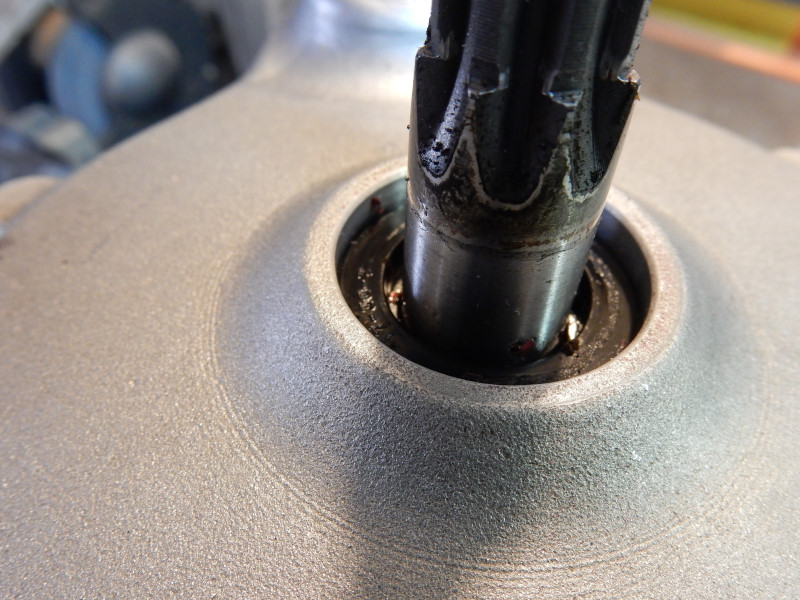
Here is a photo of what happens when the lines of a paraglider get caught in the propeller. The shaft winds up the lines and they force the seal into the casing and jam it against the bearing. The seal is crushed and destroyed and will now leak. Dirt and grime can now enter the redrive and any oil in the redrive will leak out. Even if the seal is not moved by the force of the lines, the presence of the paraglider lines between the shaft and the seal will ruin it, just the same.
Be sure to read these instructions all the way through before beginning this project. You might save time and expense.
Tools & supplies
- electric drill (a drill press is easier to use)
- 2.0mm (5/64") drill bit (a smaller bit may be used)
- #4 x 3/4" sheet metal screws (or smaller)
- 7/8" deep socket
- pick tool (see photo below)
- propane torch
- BLUE threadlock
- metric hex bit socket set
- gear puller
- masking tape
- Vaseline
- brake cleaner or mineral spirits
- Mobil One 75W-90 100% synthetic gear oil or 85W-140 gear oil
- Penetrating oil
Replacing the seal
1. Preliminaries
Remove the propeller, drain the lubricant (optional but recommended), remove the redrive from the engine, and remove the hub. Note: Do NOT even THINK of removing the hub with a puller or hammer! Follow the steps in the link!
2. Protect the shaft
Carefully wrap the shaft with 2 or 3 layers of masking tape. This is CRITICAL. If you scratch the shaft with a drill bit or a tool, the new seal will leak and you will likely have to replace the shaft. Make certain that the tape reaches down to the top of the old seal.
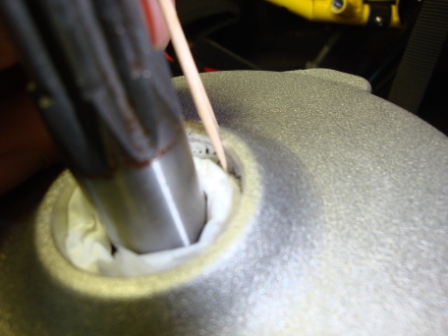
3. Remove the seal
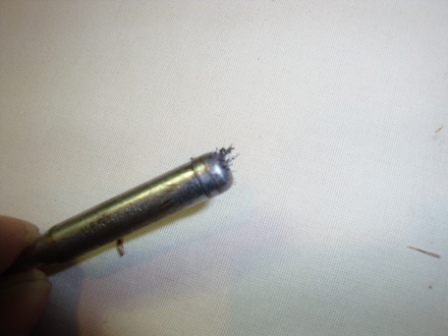
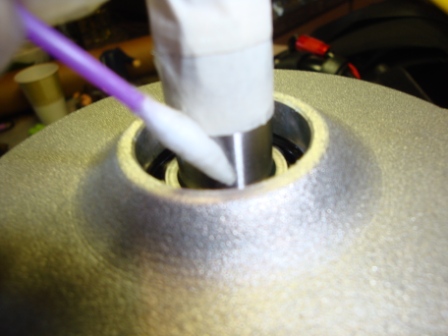
If the seal is not jammed hard against the bearing you probably will be able to remove the seal with a simple pick tool like the one below. The pick tool must have the curved tip as shown here. Do not use any other kind of pick.

The shaft of the tool is smooth and is unlikely to injure the propeller shaft.
Carefully work the hook of the tool between the inner lip (shaft side) of the seal and the shaft (see photos below). You want the tip of the hook to be to pressed as firmly as possible against the inside metal housing of the seal (red arrow in the photo below). Note that the there is just enough clearance between the top of the inside of the seal and the shaft to work the hook through. The hook has to be at an angle away from the shaft as it is worked in. The seal will be ruined but it does matter. The concern is: DO NOT SCRATCH OR MAR THE SHAFT.
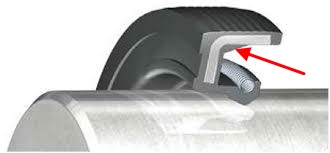
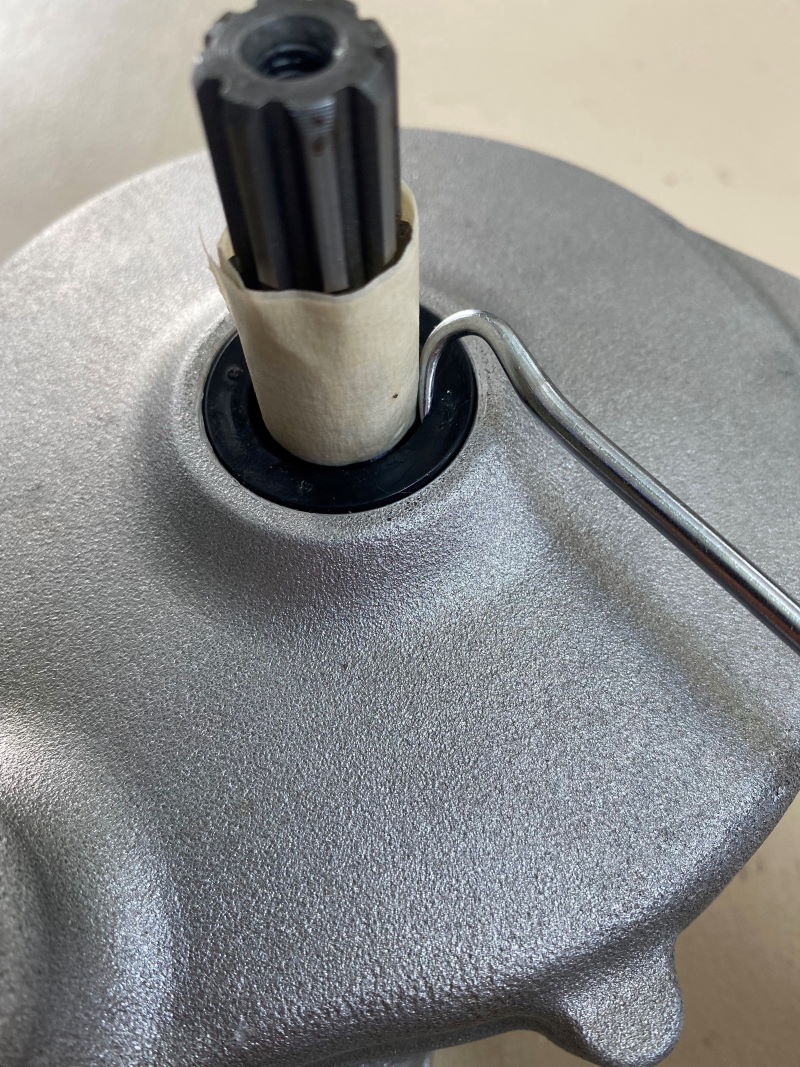
photo courtesy of Deke Jones
Once you are certain the hook is engaged, pull up gently. If you see movement, begin moving the tool around the shaft and seal. If the seal does not move, use the tool as a lever, pushing the back of the hook against the inside race of the bearings (NOT AGAINST THE BALLS IN THE BEARING.). The seal should move. Work the tool carefully around to the other side of the seal, pulling up or levering up, as needed.
If the seal will not move, carefully apply heat from a torch around the rim of the seal housing for 30 seconds. This will remove a jammed seal or one that was installed with cement. If it still will not move, you will have to continue with the steps below. If you get it out, go to step #9 below.
If this technique fails, continue with the steps below.
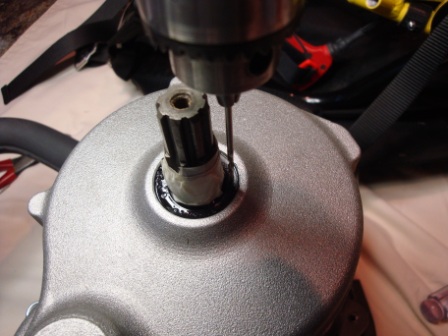
4. Removing a jammed-in seal
Take the drill bit and SLOWLY (60 RPM max) drill a shallow hole in the side of the old seal. You must use a quality electric drill as cheap ones will not turn slowly enough. Do not nick the bore in the case or the shaft. If you nick the bore, the new seal will likely take care of it. Nicking the shaft is another story....
STOP the drill the moment the bit starts to dig into the top of the seal. That is, the moment the drill penetrates the metal just beneath the rubber coating, it will act like a bolt in a nut and quickly start to go in. You must know how to detect this. You are not trying to make a round hole in the casing of the seal but just penetrate it so we can put a screw in the hole. If you do it right, you will make an opening in the metal but not go through the other side of the seal.
If you are unsure of how to do this, first practice on a tin can or an old seal. This is the hardest thing to do and you don't want to make a mistake. If you go too far, you will hit the ball bearing that is underneath the seal and scar it. Thankfully, this bearing has a thin metal retainer protecting the balls and the race but it is still possible to get a drill bit between the cracks and ruin the bearing. Take care not to contaminate the gear housing with metal chips. The seals in the housing in this photo and the one above were jammed in hard.
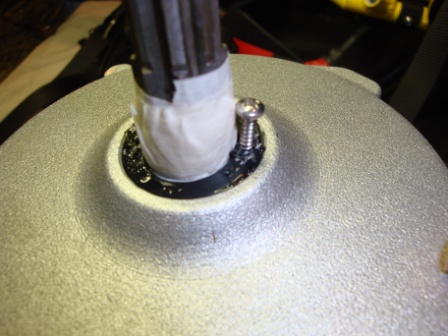
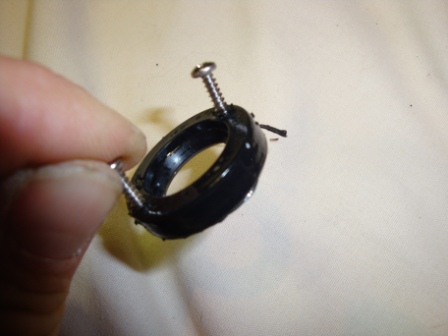
5. Insert screw in seal
Take a #4 sheet metal screw and carefully screw it about 1 1/2 turns into the hole you made. YOU MUST USE A #4 SCREW AS A LARGER SIZE WILL NOT WORK. All the screw has to do is hold against a steady and gentle pull against it. If you are careful and the seal is not jammed in too hard, you may only need one screw to pull out the seal. Use two screws if you cannot get it out with one.

6. Clean area around seal
Remove any steel flakes with a magnet. You do not want to contaminate the gear case with steel chips after the seal is popped out.
7. Remove the seal
Position the redrive (if it is not on the engine) so that the end of shaft is pointing slightly down. This will help eliminate the possibility of junk falling back into the gear case.
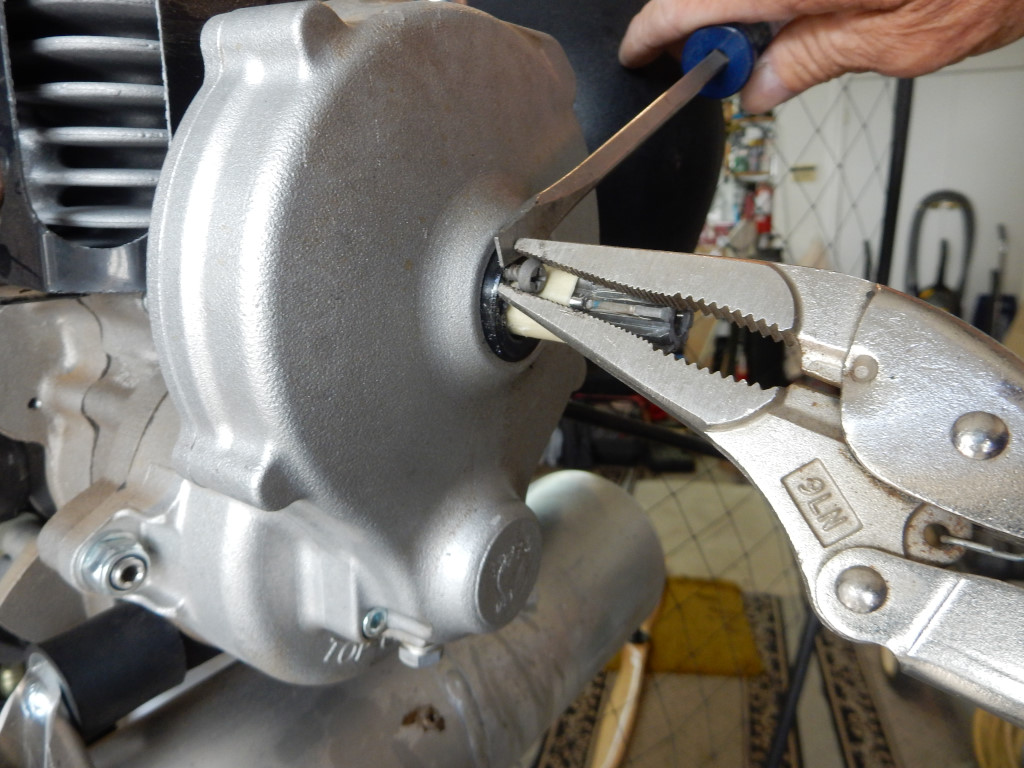
Use a small block of wood placed against the casing and a pair of wire cutters to grab the screw and GENTLY pull up the seal. Alternately, a pair of quality Vise-Grips (not the worthless Chinese knock-offs) can be used to grab the screw and a screwdriver used to push against the end of the Vise-Grips, as below. If the seal is very tight and cannot be moved with one screw, drill a second hole and try removing it from that side. You may have to pry a very little bit at a time on each side to work it out.
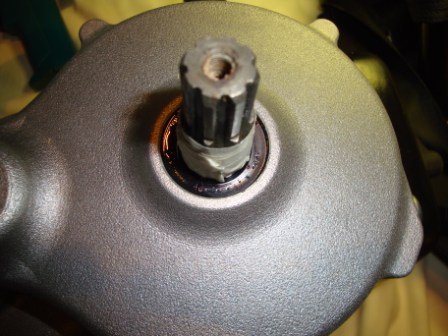
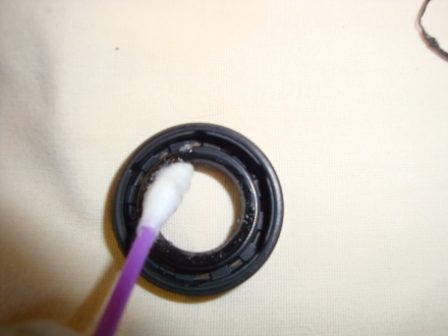
The removed seal. This one was difficult to remove.
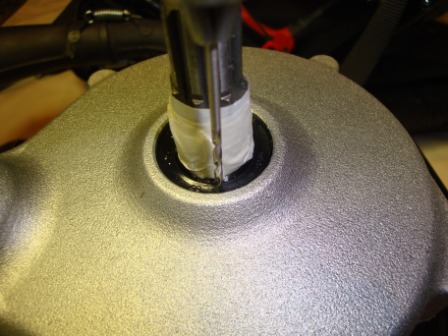
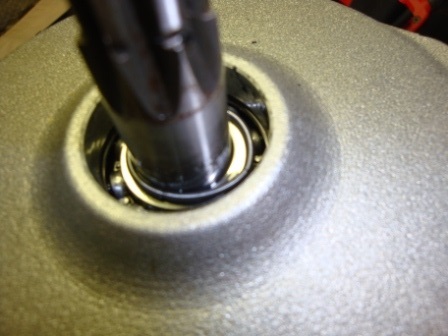
8. Clean out the bore
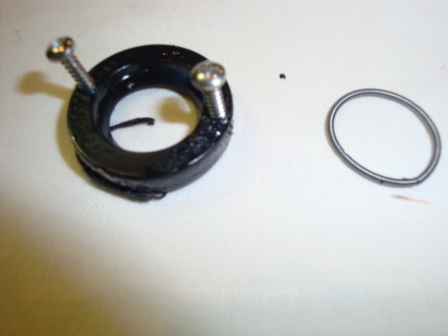
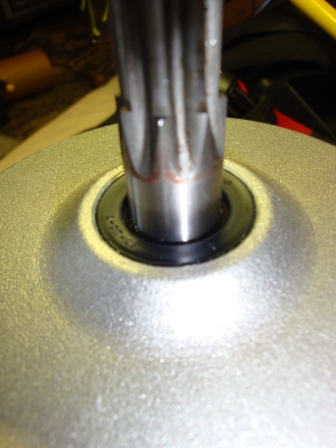
Orient the redrive shaft in a horizontal position that is pointing slightly down, if it is not already. Remove the masking tape from the shaft. Note that the old seal spring floating on the prop shaft. This was caused when the seal was originally installed by Miniplane too deeply into the bore, causing the spring to separate from the seal – and why the redrive began leaking immediately on this new engine.
If you think you contaminated the bearing or the redrive with debris, turn the engine so the shaft is pointing down, put a few ounces of the proper gear oil in the redrive with a plastic pipe or syringe. Use compressed air on the fill hole to blow the oil out through the bearing. Turn the shaft a few turns while doing this. It makes a mess below the shaft but it will thoroughly clean any debris out of the bearing.
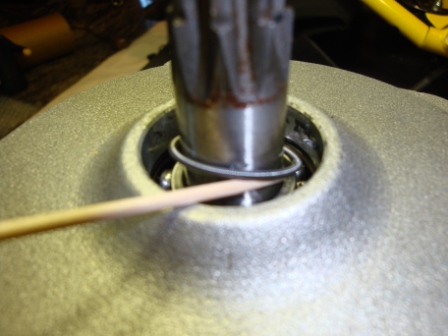
Now stuff tissue paper down into the shaft housing. Use a toothpick to scrape off the old sealant, if there is any. It will harmlessly fall out. If there is a speck or two of sealant in the redrive, it won't matter.
Remove the traces of old sealant or cement (if there is any) on the bore with brake cleaner or equivalent (mineral spirits will work but it is not as good). Do not allow brake cleaner to enter the bearing. It instantly removes the protective oil film on the bearing. If you do, use compressed air to pressurize the case which will blow out any solvent inside. Make SURE that you do not use high pressure air. 2-5 psi is plenty. Too much pressure could blow out the sealant between the case halves.
Pull out the tissue.
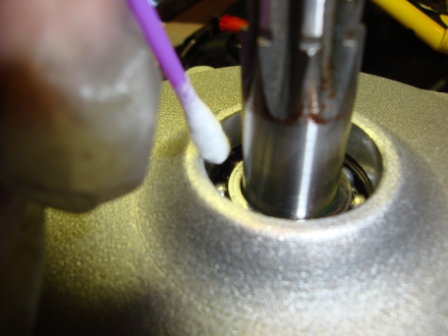
9. Prep the bore
Use a cotton swap soaked with mineral spirits or brake cleaner (best) to thoroughly clean the bore. Use a dry swab to remove any solvent.
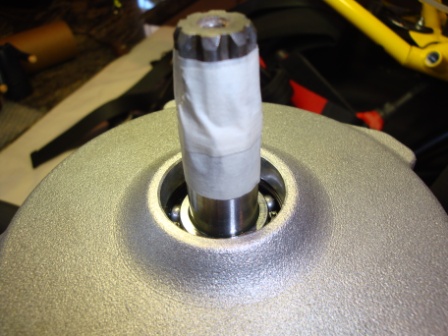
10. Protect the seal from being cut by the shaft
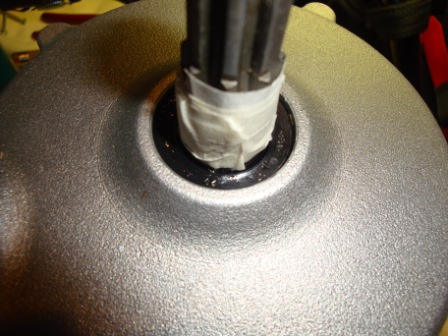
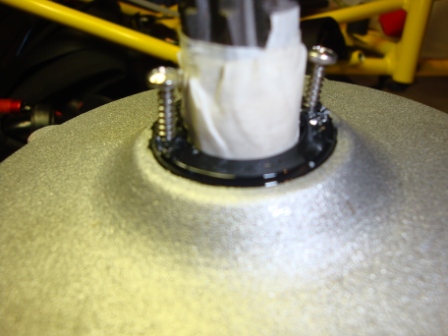
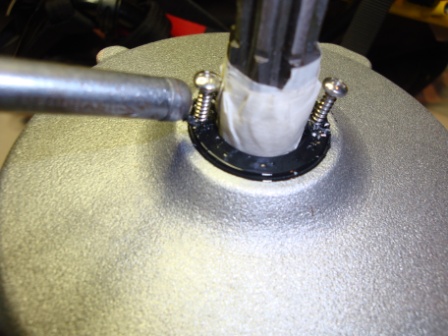
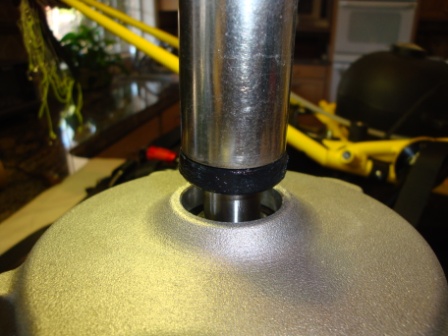
Put a single layer of masking tape around the bottom of the splines and then a single layer of tape around the top of the splines. It must be done in this order so that the seal slides smoothly over the tape and does not unwrap it. If you do not correctly complete this step, the splines on the shaft may cut the seal when it is pushed down and cause a leak. The photo below shows the top of the shaft exposed but it, too, must be wrapped in masking tape.
11. Prep the seal and shaft
Coat the inside lip of the new seal and the shaft above redrive housing with Vaseline. The lower area of the shaft does not have to be coated because the Vaseline on the upper part will be pushed on the lower part by the seal when it is installed. This will keep the seal from burning up before oil reaches it. Be careful not to get any Vaseline on the outside rim of the seal or on the bore.
12. Install the seal
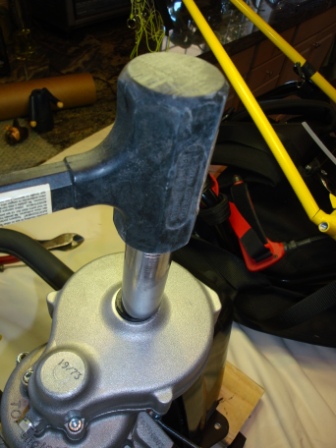
Using a 7/8" or 15/16" deep socket (or the metric equivalent), gently tap the seal down into the bore with a dead-blow or plastic tipped hammer. Note: Be EXTREMELY careful not to drive the seal in too far – it is easy to do. If you have a press, use it.
Note: Tap gently. The seal will tend to go in crooked. You must move the socket to the high side and tap/press it down. Take your time in doing this as you do NOT want to drive the seal in past the housing surface. A mistake here may require you to use a new seal and start over.
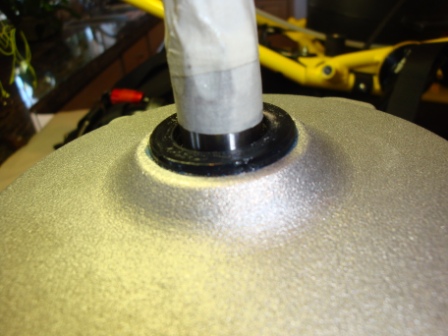
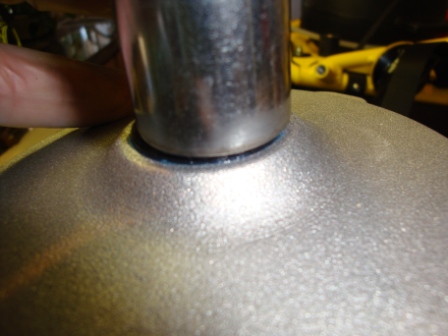
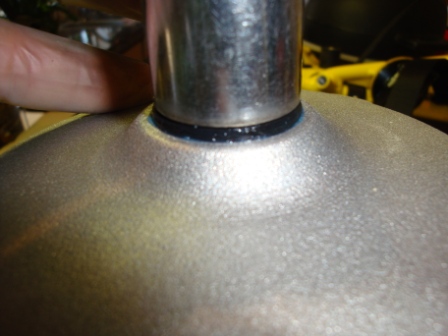
If you did it right, the new seal will be set even with the bottom of the beveled edge of the bore. If it is a millimeter or two below the top of the bore, it will not matter. There is about 5mm between the bottom of the seal and the bearing. The seal should be parallel to the bore but if it is 0.5mm off it should not matter.
13. Prep the shaft and hub
After you drive the seal in, thoroughly de-grease the shaft and propeller flange with brake cleaner or mineral spirits. Follow these instructions for re-attaching the hub to the shaft.
DO NOT PRESS OR HAMMAR THE HUB ONTO THE END OF THE SHAFT OR YOU WILL RUIN IT. FOLLOW THE INSTRUCTIONS GIVEN IN THE LINK ABOVE PRECISELY.
14. Fill the redrive with lubricant
Here are the instructions for easily refilling the redrive with the correct type and quantity of oil.
![]()

