


Miniplane hang point & harness adjustment
by Had Robinson
updated October 12, 2023
Proper hang point and harness adjustment is necessary for maximum thrust at take off, flying comfort, and ease of launch. Note: The suspension arms are shaped differently in order to minimize the torque effects of the paramotor – it is not the result of damage in transit or some other defect.
The hang point adjustment procedure below can only approximate actual harness position in the air. A companion on the ground can carefully look at the paramotor as the pilot flies by and note whether it is tilted forward (bad) or tilted slightly back (good). The presence of a full fuel tank will change things. It is best to finalize the adjustment with about 1/2 tank.
1. SUSPEND THE PARAMOTOR It must be suspended from the hang points with the pilot sitting in the harness.
2. ADJUST THE HANG POINTS This adjustment is done in three steps.
- Loosen the head screws on the collets so that they can move along the bars. We want the propeller plumb. Attach a level to the
propeller with the prop up and down (masking or duct tape can be used for this). If the propeller tips forward, move the collets forward. If the propeller tips back, move the collets
back. In order to ensure that both sides are equally spaced,
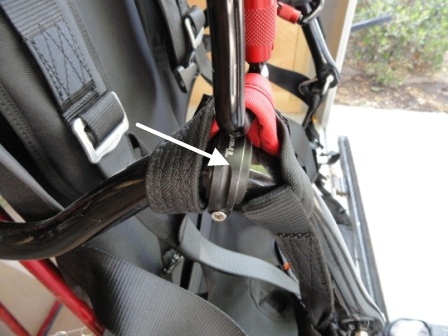
measure from the center of the collet (the arrow in the photo below) to the hole
in the suspension arm where it attaches to the frame. Make sure both collets
are the same distance. This completes the preliminary adjustment of the hang points. Do not yet tighten up the head screws on the collets. For the next steps, the motor can
be sitting on the ground.
- Move the right hang point collar 3/8" (10mm) back towards the engine if your paramotor has a gear reduction drive e.g. the Top 80.
If you are flying a belt driven paramotor e.g. the Minari or Moster 185, adjust the left collar back 3/8" (10mm). This
adjustment will help ensure that the horizontal thrust of the propeller will be the same as the forward direction of the glider.
- In flight, there is significant drag created by the pilot's legs and feet which affects the thrust vector of the propeller, causing the paramotor to tip forward a significant amount which reduces useful thrust. To compensate for this drag, move each collet forward 3/4" of an inch (away from the motor) from the 2nd adjustment above. That is, the distance from the collet to the hole in the suspension arm will 3/8" less on the right side. Now tighten the head screws on both collets.
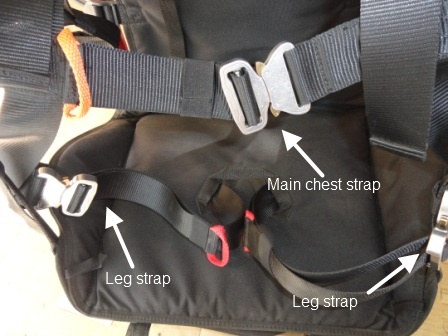
3. LEG STRAPS Adjust the leg straps so that they are tight but comfortable. The leg straps' primary function is for safety and to keep the seat elevated at the rear somewhat so that the launch run is easier by holding the seat board up and away from the back of your legs. If they are too loose, the pilot may have difficulty getting in the harness or sitting after launch (slipping forward). If they are too tight, the straps may be uncomfortable. Note: when the pilot stands up in the harness to launch or land, there are other straps that keep the harness from getting too low.
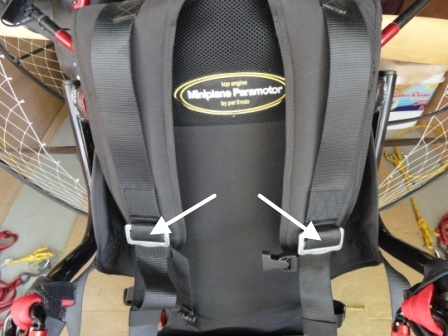
4. SHOULDER STRAPS Adjust the shoulder straps (white arrows below) so that they are comfortable when the pilot is in the sitting position (you must be sitting in the harness to adjust the primary shoulder strap.) If you shrug your shoulders and they bind, the straps are too tight. It is important to adjust these straps correctly in order to properly adjust the secondary shoulder straps (step #6 below).
5. SEAT STRAPS Adjust the seat straps so that your legs are at a comfortable angle when sitting in the harness. For long flights it is recommended that a footrest strap be installed. It will prevent the uncomfortable sensation of having your legs hanging from the edge of a chair for long periods. The short seat on the Miniplane is necessary for the launch run. If it were longer, the pilot’s legs would be hindered while running.
6. SECONDARY SHOULDER STRAPS
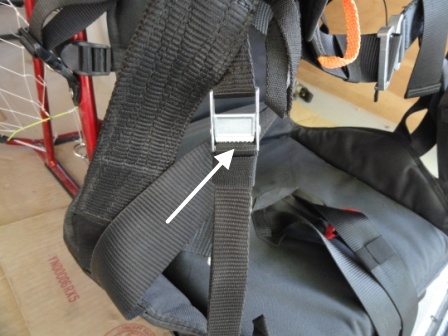
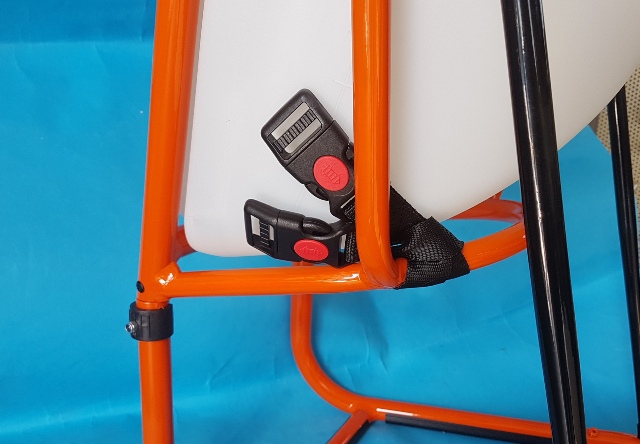
- OLD STYLE While standing up with the paramotor on your back, tighten the secondary shoulder straps indicated in the
photo below to make the harness/frame high enough so that the back of the seat almost touches the pilot's rear. The lower the frame is, the more likely the back of your legs will hit it.
If the primary shoulder straps (step #4) are too loose, there will be problems getting this adjustment correct. The tighter the secondary straps are, the higher the harness/frame is on the
pilot’s back while launching. If they are too tight, you will not be able to sit in the harness and you might not be able to get in the harness in the first place. This adjustment
takes a long time to get right but it is worth the effort.
Another downside of getting these straps tighter is that the buckles may break, especially if you have a hard landing. This problem is much more acute for smaller and thinner pilots. Go to this page to see different ways to permanently fix this problem. It is a design error of the Miniplane harness. The back strap (just to the right of the secondary shoulder strap in the photo below) must be tight enough to prevent excessive lateral movement of the harness but loose enough so that it allows the rear of the rear of the seat to move up while doing the launch run.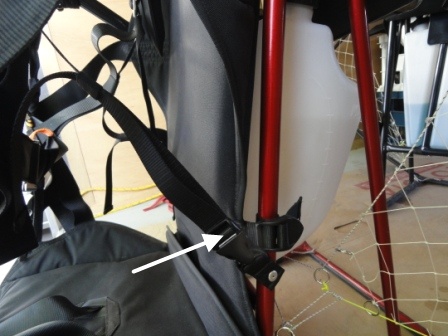
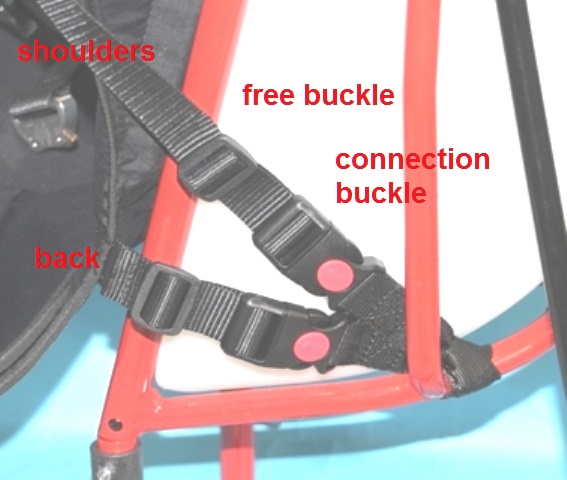
- NEW STYLE While standing up with the paramotor on your back, tighten the secondary shoulder straps
indicated in the 3rd photo below ("shoulders") to make the harness/frame high enough so that the pilot can comfortably run while
launching. The lower the frame is, the more likely the back of your legs will hit it when running. If the primary shoulder
straps (step #4) are too loose, there will be problems getting this adjustment correct. The tighter the secondary straps are, the
higher the harness/frame is on the pilot’s back while launching. If these straps are adjusted too loose, the lower part of the
frame will tend to hit the back of the pilot's legs when launching. The new style is only slightly less prone to the buckles breaking.
The back strap must be tight enough to prevent excessive lateral movement of the harness but loose enough so that it allows the rear
of the seat to move up while doing the launch run.
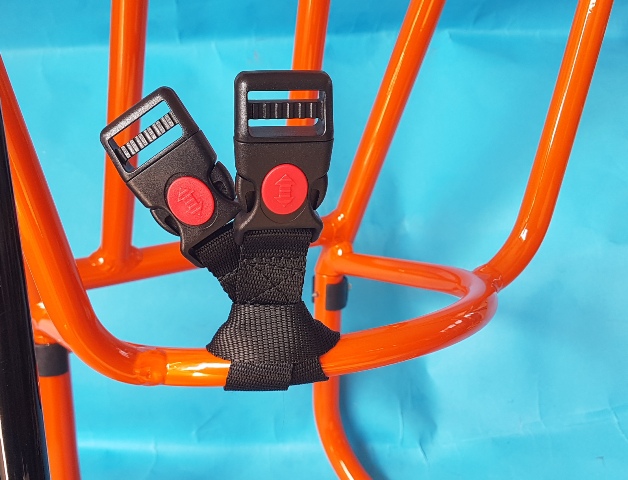
7. CHEST STRAPS There are two chest straps. The main chest strap (the lower of the two) must be tightened just enough to keep the suspension bars from separating around the circular contact point with the frame. In other words, there should be no space around the circular plastic disk indicated by the arrow in the photo below. This strap is primarily a safety strap.
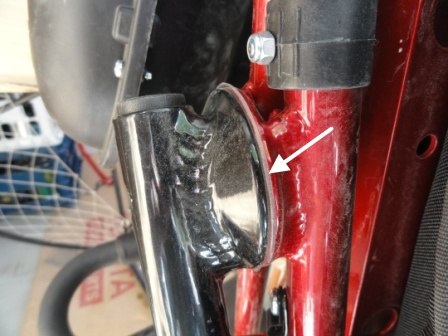
If this strap is too tight or too loose, it will strain the contact point between the bar and the frame. While sitting in the suspended harness, loosen or tighten the main chest strap so that the circular contact points on the bars are flush with the circular contact points on the frame. This adjustment will also affect the spacing between the hang points which will, in turn, affect the safe handling of the glider.
The upper chest strap is used to help prevent the shoulder straps from slipping off the pilot.
FINAL CHECK Sit in the harness and check all adjustments. Comfort is the most important consideration when adjusting the harness. An uncomfortable harness is a distraction and, therefore, a safety issue.
![]()

